작업하는 환경 : RockyLinux9.3
오픈스택을 구성하다보면 각 패키지별(keystone/glance/nova/neutron/horizon/cinder 등등등)이 모두 api 를 지원한다. 근데 뭔가... http로 운영하는건 보기 싫었다. 지금 인터넷도 80보단 전부 443을 사용하는데 내가 쓰는 환경에 대해서도 똑같은 수준으로 무언가 관리하는게 더좋아보였다. 그렇게 사설인증서를 만들고 사용하기 위해 이것저것 찾아보기 시작했다.
1. openssl 패키지 확인
아무리 mininal로 설치하더라도 기본적으로 설치되어있다. 하지만 돌다리는 언제나 두들기고 건너는 법
[root@ctr ~]$ rpm -qa | grep openssl
openssl-libs-3.0.7-24.el9.x86_64
openssl-3.0.7-24.el9.x86_64
2. ROOTCA를 만들자
ROOTCA를 만들기 위해 제일 먼저 내가 사용할 Key파일을 생성한다.
나는 AES256 으로 2048bit의 Key 파일을 사용하기로 결정했고, Key파일에 비밀번호는 P@ssword1로 설정했다.
[root@ctr ~]$ openssl genrsa -aes256 -out ROOTCA.key 2048
Enter PEM pass phrase: #P@ssword1
Verifying - Enter PEM pass phrase: #P@ssword1
[root@ctr ~]$
만들어진 Key파일을 통해서 CSR파일(Certificate Signing Request)를 생성한다.
[root@ctr ~]$ openssl req -new -key ROOTCA.key -out ROOTCA.csr
Enter pass phrase for ROOTCA.key: ##P@ssword1
You are about to be asked to enter information that will be incorporated
into your certificate request.
What you are about to enter is what is called a Distinguished Name or a DN.
There are quite a few fields but you can leave some blank
For some fields there will be a default value,
If you enter '.', the field will be left blank.
-----
Country Name (2 letter code) [XX]:KR ##국가코드 KR
State or Province Name (full name) []: ## 경기도/강원도 등등의 도는 여기 기입
Locality Name (eg, city) [Default City]:Seoul ## 시 기입
Organization Name (eg, company) [Default Company Ltd]:WeetLies Private ##회사명 기입
Organizational Unit Name (eg, section) []:Private ## 부서명 기입
Common Name (eg, your name or your server`s hostname) []:weetlies.kr ## 도메인
Email Address []:admin@weetlies.kr ## 담당자이메일

Please enter the following 'extra' attributes
to be sent with your certificate request
A challenge password []: ## 선택사항
An optional company name []: ## 선택사항
[root@ctr ~]$ ll
total 12
-rw-------. 1 root root 1158 Dec 15 20:32 anaconda-ks.cfg
-rw-r--r--. 1 root root 1041 Dec 16 18:08 ROOTCA.csr
-rw-------. 1 root root 1874 Dec 16 18:02 ROOTCA.key
csr파일과 Key파일을 통해서 ROOTCA.crt파일(인증서)을 생성한다. 인증서 유효기간은 1년으로 지정한다. 이때 유효기간을 길게 잡을 예정이라면 365 대신 원하는 날짜를 지정하면 된다. 물론 ROOTCA는 만들고 나중에 하위 인증서를 인증하는 용으로 많이 사용할 예정이니 기간을 꽤 길게 잡아서 쓰기도 한다... 예를 들어 36500 라던가...(100년)
[root@ctr ~]$ openssl x509 -req -days 365 -set_serial 1 -in ROOTCA.csr -signkey ROOTCA.key -out ROOTCA.crt
Enter pass phrase for ROOTCA.key: ##P@ssword1
Certificate request self-signature ok
subject=C = KR, L = Seoul, O = WeetLies Private, OU = Private, CN = weetlies.kr, emailAddress = admin@weetlies.kr
[root@ctr ~]$ ll
total 16
-rw-------. 1 root root 1158 Dec 15 20:32 anaconda-ks.cfg
-rw-r--r--. 1 root root 1265 Dec 16 18:11 ROOTCA.crt
-rw-r--r--. 1 root root 1041 Dec 16 18:08 ROOTCA.csr
-rw-------. 1 root root 1874 Dec 16 18:02 ROOTCA.key
[root@ctr ~]$
3. SSL인증용으로 사용할 인증서를 만들자!
ROOTCA가 만들어졌으니 이제 controller노드에 사용할(API응답용) ssl인증서를 새로 만들어보자.
ROOTCA를 만들때와 동일하게 먼저 controller노드가 사용할 ssl용 Key파일을 먼저 발급한다. 이번엔 비밀번호를 2로 바꿔서 저장했다...(어쨋든 비번은 따로 관리해야지?!!?!)
[root@ctr ~]$ openssl genrsa -aes256 -out commonkey.key 2048
Enter PEM pass phrase: ##P@ssword2
Verifying - Enter PEM pass phrase: ##P@ssword2
[root@ctr ~]$
만들어진 키를 통해서 controller가 사용할 CSR파일을 생성한다.
[root@ctr ~]$ openssl req -new -key commonkey.key -out controller.csr
Enter pass phrase for commonkey.key: ##P@ssword2
You are about to be asked to enter information that will be incorporated
into your certificate request.
What you are about to enter is what is called a Distinguished Name or a DN.
There are quite a few fields but you can leave some blank
For some fields there will be a default value,
If you enter '.', the field will be left blank.
-----
Country Name (2 letter code) [XX]:KR ## 국가코드
State or Province Name (full name) []: ## 주를 말하지만 우리나라의 경우 도 개념
Locality Name (eg, city) [Default City]:Seoul ## 시
Organization Name (eg, company) [Default Company Ltd]:weetlies Private ## 회사명/ 그룹명
Organizational Unit Name (eg, section) []:Controller ## 부서명
Common Name (eg, your name or your server`s hostname) []:ctr.weetlies.kr ##핵심:사용할도메인정보가 여기 들어가야한다.
Email Address []:ctr@weetlies.kr ## 담당자 이메일

Please enter the following 'extra' attributes
to be sent with your certificate request
A challenge password []: ##무시가능
An optional company name []: ##무시가능
[root@ctr ~]#
CSR파일까지 발급받았다면 이제 crt파일을 발급받자.
ROOTCA인증서를 발급받을때와 다르게 하위 인증서를 발급받을때는 ROOTCA인증서의 정보를 사용해서 서명을 받아야 하기때문에 명령어 옵션이 다르니 잘 확인하자
[root@ctr ~]$ openssl x509 -req -days 180 -in controller.csr -CA ROOTCA.crt -CAcreateserial -CAkey ROOTCA.key -out controller.crt
Certificate request self-signature ok
subject=C = KR, L = Seoul, O = weetlies Private, OU = Controller, CN = ctr.weetlies.kr, emailAddress = ctr@weetlies.kr
Enter pass phrase for ROOTCA.key: ##P@ssword1
[root@ctr ~]$
4. 근데 왜 또 한번더 작업하냐!? 그것은 아파치의 편의성....
위에 만든키를 사용해 웹서비스를 사용하면 된다. 근데 이게 Tomcat형태의 WAS에서는 conf 파일에 인증서 키 비밀번호를 같이 저장해두고 쓰면 되는데 아파치(apache2/httpd)가 인증서 비밀번호를 따로 물어보게 되어있다보니... 귀찮다.... 스크립트화 해서 비밀번호를 저장하고 아파치 conf 파일에 추가해줘야하는데 그럴빠에 그냥 나혼자 쓰는 인증서 패스워드를 날려버리기로 결정했다.
## commonkey.key을 불러와 key에서 비밀번호를 제거한 파일을 생성한다.
[root@ctr ~]$ openssl rsa -in commonkey.key -out npw_commonkey.key
Enter pass phrase for commonkey.key: #P@ssword2
writing RSA key
[root@ctr ~]$
[root@ctr ~]$ openssl req -new -key npw_commonkey.key -out npw_controller.csr
You are about to be asked to enter information that will be incorporated
into your certificate request.
What you are about to enter is what is called a Distinguished Name or a DN.
There are quite a few fields but you can leave some blank
For some fields there will be a default value,
If you enter '.', the field will be left blank.
-----
Country Name (2 letter code) [XX]:KR ##국가코드
State or Province Name (full name) []: ## 도
Locality Name (eg, city) [Default City]:Seoul ## 시
Organization Name (eg, company) [Default Company Ltd]:weetlies Private ## 회사명/부서명
Organizational Unit Name (eg, section) []:Controller ## 부서
Common Name (eg, your name or your server`s hostname) []:ctr.weetlies.kr ## 도메인
Email Address []:ctr@weetlies.kr ## 담당자이메일

Please enter the following 'extra' attributes
to be sent with your certificate request
A challenge password []: ##무시가능
An optional company name []: ##무시가능
[root@ctr ~]$ openssl x509 -req -days 180 -in npw_controller.csr -CA ROOTCA.crt -CAcreateserial -CAkey ROOTCA.key -out npw_controller.crt
Certificate request self-signature ok
subject=C = KR, L = Seoul, O = weetlies Private, OU = Controller, CN = ctr.weetlies.kr, emailAddress = ctr@weetlies.kr
Enter pass phrase for ROOTCA.key: ## P@ssword1

## 모든 작업이 끝나면 아래와 같이 파일들이 생긴다.
[root@ctr ~]$ ll
total 44
-rw-------. 1 root root 1158 Dec 15 20:32 anaconda-ks.cfg
-rw-------. 1 root root 1874 Dec 16 18:22 commonkey.key
-rw-r--r--. 1 root root 1298 Dec 16 18:30 controller.crt
-rw-r--r--. 1 root root 1050 Dec 16 18:24 controller.csr
-rw-------. 1 root root 1704 Dec 16 18:50 npw_commonkey.key
-rw-r--r--. 1 root root 1298 Dec 16 18:52 npw_controller.crt
-rw-r--r--. 1 root root 1050 Dec 16 18:51 npw_controller.csr
-rw-r--r--. 1 root root 1265 Dec 16 18:11 ROOTCA.crt
-rw-r--r--. 1 root root 1041 Dec 16 18:08 ROOTCA.csr
-rw-------. 1 root root 1874 Dec 16 18:02 ROOTCA.key
-rw-r--r--. 1 root root   41 Dec 16 18:52 ROOTCA.srl
5. 이건 정말 뜬금없이 여담이지만 와일드카드인증서를 발급받고 싶다면
[root@ctr ~]$ openssl req -new -key npw_commonkey.key -out npw_wildcard.csr
You are about to be asked to enter information that will be incorporated
into your certificate request.
What you are about to enter is what is called a Distinguished Name or a DN.
There are quite a few fields but you can leave some blank
For some fields there will be a default value,
If you enter '.', the field will be left blank.
-----
Country Name (2 letter code) [XX]:KR ##국가코드
State or Province Name (full name) []: ##도
Locality Name (eg, city) [Default City]:Seoul ##시
Organization Name (eg, company) [Default Company Ltd]:weetlies Private ##회사명/그룹명
Organizational Unit Name (eg, section) []:Domain Access ##부서
Common Name (eg, your name or your server`s hostname) []:*.weetlies.kr ##도메인: 여기에 와일드카드로 등록한다.
Email Address []:domainacc@weetlies.kr ##담당자이메일

Please enter the following 'extra' attributes
to be sent with your certificate request
A challenge password []:##무시가능
An optional company name []:##무시가능
[root@ctr ~]$ openssl x509 -req -days 180 -in npw_wildcard.csr -CA ROOTCA.crt -CAcreateserial -CAkey ROOTCA.key -out npw_wildcard.crt
Certificate request self-signature ok
subject=C = KR, L = Seoul, O = weetlies Private, OU = Domain Access, CN = *.weetlies.kr, emailAddress = domainacc@weetlies.kr
Enter pass phrase for ROOTCA.key: ##P@ssword1
[root@ctr ~]$ ll
total 52
-rw-------. 1 root root 1158 Dec 15 20:32 anaconda-ks.cfg
-rw-------. 1 root root 1874 Dec 16 18:22 commonkey.key
-rw-r--r--. 1 root root 1298 Dec 16 18:30 controller.crt
-rw-r--r--. 1 root root 1050 Dec 16 18:24 controller.csr
-rw-------. 1 root root 1704 Dec 16 18:50 npw_commonkey.key
-rw-r--r--. 1 root root 1298 Dec 16 18:52 npw_controller.crt
-rw-r--r--. 1 root root 1050 Dec 16 18:51 npw_controller.csr
-rw-r--r--. 1 root root 1310 Dec 16 19:01 npw_wildcard.crt
-rw-r--r--. 1 root root 1058 Dec 16 18:59 npw_wildcard.csr
-rw-r--r--. 1 root root 1265 Dec 16 18:11 ROOTCA.crt
-rw-r--r--. 1 root root 1041 Dec 16 18:08 ROOTCA.csr
-rw-------. 1 root root 1874 Dec 16 18:02 ROOTCA.key
-rw-r--r--. 1 root root   41 Dec 16 19:01 ROOTCA.srl
[root@ctr ~]$
이렇게 만들어진 인증서 중 ROOTCA.crt파일은 서버에서 꺼내 나중에 openstack horizon을 접속해서 볼 PC에 설치를 한다.

인증서 설치(I)를 클릭.
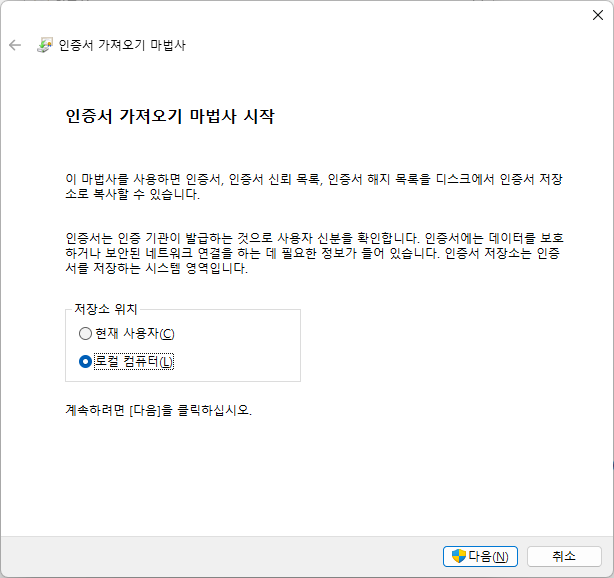
로컬 컴퓨터(L) 선택 후 다음
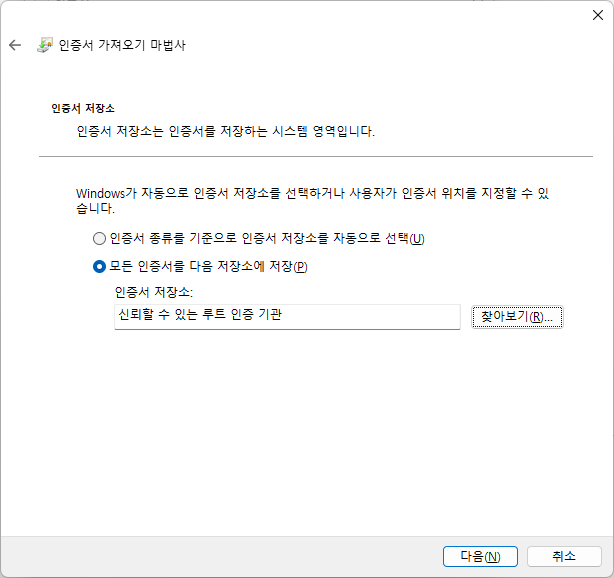
모든 인증서를 다음 저장소에 저장을 선택한 다음 찾아보기를 눌러서 "신뢰할 수 있는 루트 인증 기관"을 선택한다.
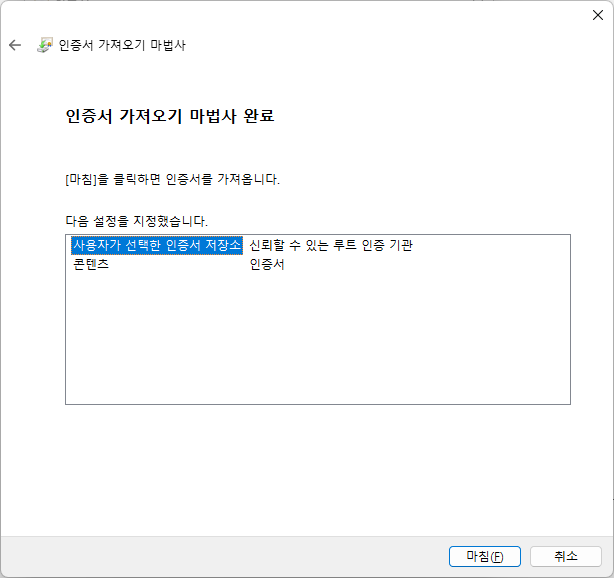
이 화면이 뜨면 마침을 누른다.

정상적으로 완료가 됬다면 이렇게 팝업이 뜬다.

한번더 인증서가 제대로 설치되었는지 확인을 위해 시작-> certmgr.msc 엔터
아래와 같은 창이 뜨면 신뢰할 수 있는 루트 인증기관 -> 인증서에 들어가서 내가 만든 인증서가 있는지 확인한다.
예전에 따로 만든거랑... PC까지 있네....
이제 인증서 생성 끝났다!